Wednesday

Let's get Insulated

If  you live in an old house, you probably know that cold air some how finds its way through any crack or cranny possible. Old houses (especially larger ones), are just not insulated the way newer homes tend to be. Although our house is very small (or minimal, as we say), we find energy bills to be surprisingly high in during the colder and warmer months. We have also found that one side of our house stays fairly temperate, while the other side (the side with our bedroom on it) is always either freezing or rain forest hot.

So....backtracking just a bit....when we re-tiled our beloved tile shower (remember, the shower of problems  from a while back?), we discovered that there was absolutely no insulation on one side of the house. When our fabulous tile guy came in for the shower overhaul, he noticed this issue through the opening he had to make in the bathroom ceiling.

To make a long story very short...we decided that we had to insulate our house (which we have just now gotten around to doing). Not only were we freezing in the winter time and sweating in the summer time, but we were spending money cooling and heating a house that was not holding up its end of the bargain. After some careful research, we (ok, Chris) found that this little insulation problem could be easily fixed in a one afternoon DIY session.
 SO....to Lowe's we go.....

Chris  found a great deal on "green insulation," which as far as I understand, basically means a bunch of recycled paper crap that has been chopped up and compressed into a big block.

< See exhibit A-recycled paper insulation crap.


He also rented an insulation blower. Now...when I say insulation blower, I mean a huge metal thing with a big hose that makes lots of noise. See exhibit B, below:


Now, Chris had drafted a very well thought out plan outlining how we were going to blow the insulation throughout the attic of the house, forever solving our heating and cooling problems for a very reasonable financial investment. I, being the supportive wife that I am, agreed to this venture, blessing it whole-heartedly and moving along on my merry way.

Until I got drafted to help.

Once we got the blower situation and all the insulation in place, we realized that this was most certainly a two person job. I, being that same loving supportive wife that I was in the paragraph above, hesitantly agreed to help in the insulation placement escapade. Chris carefully explained how the blower worked and when to replace the recycled paper crap, how to carefully feed the blocks of recycled paper crap through the blower, etc.  He climbed into the attic, with the insulation hose in tow and once situated, gave me the green light to turn the machine on.


What you see here is a photo of the rented blower, the mound of recycled paper crap and my adoring husband. What you do not see is my Taliban-inspired get up, complete with face and head covering, as I was sure the paper crap particles would fly into the air, suffocating me and leaving me dead on the porch, covered in gray recycled crap powder. (note: I was a little overly-cautious. There was a significant amount of dust...but nothing warranting the safety precautions I had in place).

Once the machine was turned on, it began slowly moving recycled crap matter up the hose. I could see some material moving, but not very much. I had expected the machine to pull the material quickly, and that I would have to work to get the next block of insulation unwrapped and broken up to feed it through. For whatever reason, however, this did not happen. After about 10 minutes, I felt my cell phone vibrate with a call from Chris (from the attic, mind you). The blower was so loud that we had planned to communicate from attic to porch, via cell phone. I turned off the machine to hear him, only to find that no insulation had been coming out of the hose on his end.

So there we were, me in my Taliban-insulating costume and Chris trapped in the attic with a non-working insulation hose and dozens of blocks of recycled paper insulation crap to spread throughout the house. The machine was not working. It was a failure. What were we to do?

Hire it done. That's what we were to do.

We took the darn blower back to Lowe's, along with the blocks of paper recycled reclaimed green insulation crap and got our money back. Apparently, the machine we got a hold of was just a lemon. This process should have worked and should have been successful. The good news for us, however, is that we found a company that was able to come out and insulate the attic for about the same cost as it would have been to complete the job ourselves. Moral to the story: some things just aren't worth getting trapped in the attic with a stopped up insulation hose and a wife stuck on the porch in a Taliban-outfit and a thin layer of gray dust in her hair.

Insulation is a great thing. We are already noticing a difference in our climate de casa (that was supposed to read: climate of our house, in Spanish.) and we are looking forward to seeing our next power bill. If you do ever decide to insulate your own home, make sure you get a good machine. Also make sure you have help and face masks for all parties involved.

the end.


Tuesday

Would you like a table or a booth?

Another "secret" to living in a small home and maximizing the space you have: You need creative nooks, crannies, seating and storage. Now, we have done some pretty creative things in our home but I personally think this is the most creative.  We recently installed a restaurant-style booth in our kitchen.  Our floor plan is originally intended to include two bedrooms, a kitchen, laundry, living space and two full baths.  Because we don't have children, we turned our second "bedroom" into a dining room. Look for a post about the dining room later. It is a work in progress.

We use our dining room for when guests come over, in addition to storage for my saddles, our china, the wine rack (ok...one of the wine racks), and Thomas' bed time kennel. Since we moved into the house, we have had a small dinette in the kitchen, just big enough for the two of us.

In an attempt to be more creative with the space, and partly just to see if it would work, I decided I wanted a booth. My sweet husband  gladly accepted the challenge and we started shopping.

If you have ever priced booths (not that it's a normal thing to shop for), you know they are pretty expensive. Wood is also expensive. Luckily, we have a wonderful "wood guy" from Hawkinsville that Chris found on Craigslist who hooked us up with some awesome wood for this project. We truly are the Craigslist King and Queen. Don't worry...I am perpetually watching over my shoulder for the Craigslist killer...no Lifetime movies here.

So...enter booth building phase. After finding the wood for the table top, we needed benches. Rather than build them from scratch, we decided to repurpose some old church pews from a nearby church.  The pews had been sitting outside behind the church for months. We inquired about them and made a donation to purchase them.  Chris refinished them and behold...the beginnings of our restaurant booth!

Now...the booth is not perfect. It is shorter than a normal table (because of the pews), but with some decorative pillows...it looks just right in our kitchen.


The Birth of the Booth    Here is where we ate before we came up with the booth idea. This is a cute little dinette we picked up for about $150 when we first got our house. It has lived a good life and has served its purpose. We have recently re-purposed her to fill another role in the house. 
Stage 1: The Seats
We knew that we would want seats for our booth that were comfortable, functional and unique. We also knew that we would have to some how fit a strict bill for length and height in order to make them fit in the kitchen. Luckily (and through divine intervention, no doubt), we happened upon some old church pews at a neighborhood church. Two pews had, for whatever reason, been removed from the sanctuary and were sitting out behind the church. We inquired as to the fate of the pews and, through the generosity and good nature of the church staff (you know who you are...thank you!), we were able to make a more than reasonable donation in exchange for the pews.  The pews are VERY old and when we got them, had old green upholstery stapled to them. Chris removed the upholstery, cleaned up and sanded the pews and voila!

Stage 2: The Table

Once we got one of the pews situated and attached to the wall, we had to figure out what to do about a table. This is where our new friend from Craigslist enters the picture. With a little help from our new woodworking friend, Chris as able to build the table for the booth himself. He then attached the table to the wall, placing three hinges at the back, and a temporary leg underneath. After the table was placed, the staining party began. Because the pews and the table wood were different in grain, the stain absorbed into each surface differently. I kind of like the variation though. A few quarts of stain and some polyurethane later and there we have it...finished wood.


Stage 3: The Finishing Touches
Once we got everything refurbished, built and attached, it was time to accessorize. Now, we all know that old fashioned church pews are not designed to be comfy, especially without the fabulous upholstery that normally adorns them. In order to make our pews-turned booth seats comfortable to sit in, we needed cushions of some description. Of course, I was tasked with tracking down this essential piece of the puzzle. 

I considered making the cushions, which would probably run anywhere from $5-$10 per yard of fabric, plus the filler, but I then came to my senses. If you have ever shopped for decorative pillows, you know they can be pricey and often very disappointing when actually used for comfort. After a long search, I finally found four pillows that would do the trick.  
The next step in the booth building process required us to shed some light on the situation, literally. We decided that to complete the restaurant experience in our kitchen, we needed a suitable light fixture. Behold: our Apple-bee's lamp. This fixture completed the look and is sure to illuminate our table for "eatin' good in the neighborhood, for years to come". We picked the beauty up at a local charity auction and hired an electrician to install it (we don't do electrical work....it's a bad idea.). 

The final, final touch to conclude a most laborious task to date? Adding a bovine wall, of course. We added cow prints, created by an artist from Sanibel Island, Florida. I just can't resist good cow art. 


And there we go...a perfect table for two.


Saturday

Our Minimal Mansion...on Vacation

Every year for my entire life, my family has taken a one week vacation to Fort Myers, Florida. Fort Myers is a special place for our family not just because we visit every year, but because we own a home there. Now, let me clarify, by "home" we are not talking about a beach house with a stocked mini bar and pool boy; no, we are talking about an early 1900's home that has been in my family for over four generations.

As you can imagine, the house has character. Within the house, there are four apartments, two of which my family rents out. One of the apartments is recently vacant, which we have decided to keep for our family to use. The last apartment has always been reserved for our family vacations and in past years has made a perfect spring break headquarters for countless college girls.


So why are we including a tidbit about our vacation in the MM blog, you ask? It's quite simple, really; we have a love for historic homes. Each year, my father takes a one-two week "vacation" down to Fort Myers. He spends well over half his trip working on the house. Anyone who owns a home knows that houses require your full dedication to maintain, especially when they are aged. Whether it is replacing screens, patching up walls or re-doing floors, the grand old Fort Myers house demands our family's full attention, vacation or not.


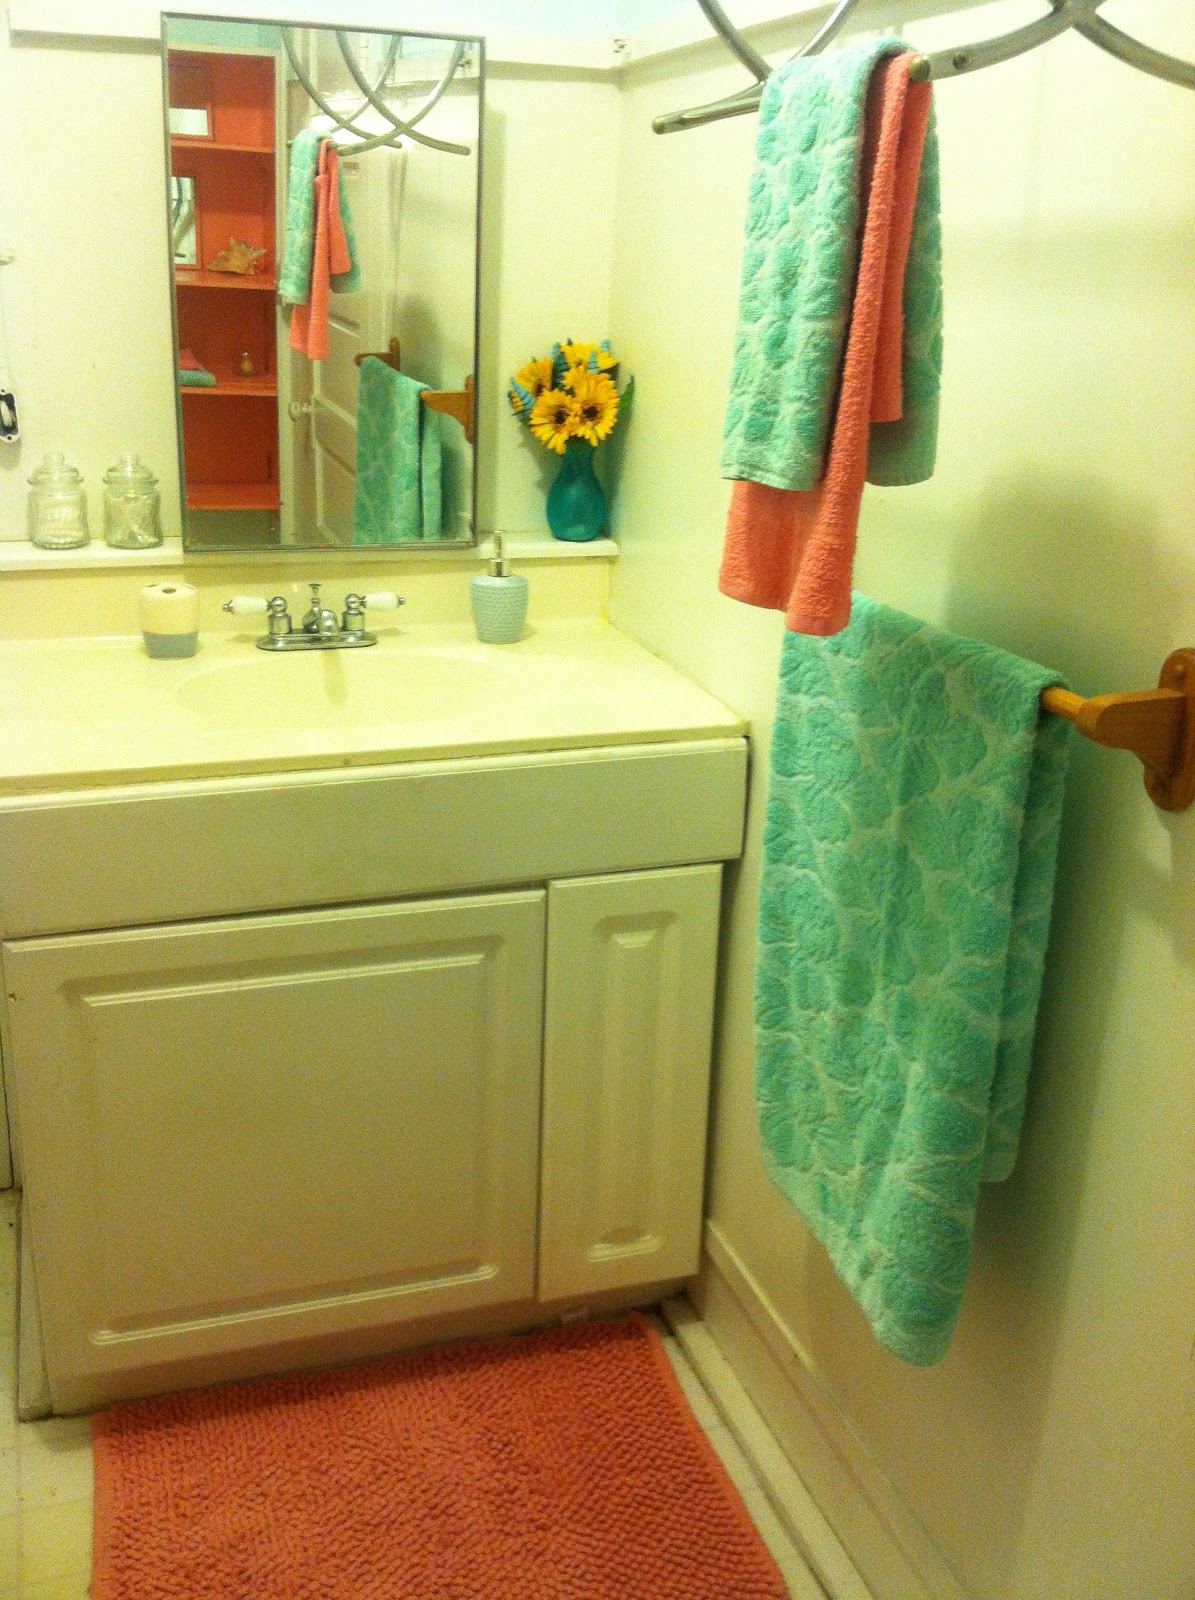
This year, Chris and I  wanted to help out as much as possible with the house. We love it and we want to do our part in helping preserve it for the next generation (the pig and the shih tzu, of course). While Chris was busy replacing ceiling tiles and monitoring a leaking pipe, I decided to give the bathroom of the recently vacated apartment a little face lift.

The canvas I had to work with was quite dismal; it had been occupied by a single guy (no offense guys), so it was completely void of color and actually kind of "blah".  In addition, the bathroom also faced several challenges that come with any old house; chipping paint, old wallpaper in various places and nail holes that are likely decades old.

Here are a few pictures of where we started with the bathroom project:


You can see how I felt there was a need for a change here.


so....a couple quarts of paint and one trip to the flea market later:


And there you have it....and afternoon of cleaning, painting and sprucing and it looks a little more comfortable than before. It isn't grand or luxurious but it will do. As we continue to slowly rehab and preserve the Fort Myers house, I am sure that this will be further updated. 

Moral to the story: a fresh coat of paint and a few accessories and you just might have yourself a decent looking powder room. 

Old homes require work and attention but they return your love ten fold; this house has a story (lots in fact) and more character than any beach bungalow with a mini bar and a pool boy. It is our little "minimal mansion" away from the Minimal Mansion.

Wednesday

Serious DIY-Mode

If you're a homeowner (or even a very invested home-renter), you know home improvements and projects never really end. By the time you are happy with a room, a chair, a paint color, a rug or a flower bed, you have either already changed your mind OR something has broken and needs to be fixed.

Over the past couple of months, we have been in serious DIY mode (well, we always kind of are but this time it is REALLY serious). You have not heard from us in a while because we are currently in the middle of several major home improvement undertakings. Now, I do not want to spoil the outcomes of some of these projects by posting prematurely so,  this post is just to inform you that yes, we are still alive and no, we have not moved out of the mansion. Our current projects have not only kept us very busy but have also provided us with several new adventures and as always, a few lessons learned.

Stay tuned for what are sure to be either delightful or disastrous DIY adventures at the "mansion"....

The day I discovered stainless steel spray paint...

Today will forever go down in history as the day I met what is sure to be a lifelong friend, stainless steel spray paint. We met on the paint aisle in Michael's craft store and it was love at first site. I was originally in the market for regular metallic silver spray paint, which I had planned to use for several pending projects around the house. The stainless steel captured my heart though, and walked me down the paint aisle all the way to the register.

Not only did the stainless steel woo me from the beginning, but my new friend at the cash register ("Chrystal," I believe?) gave me a teacher's discount, on top of my 40% off coupon. Today was a good day.


So the spray paint and I came home and got to work immediately. I had intended to embellish some old bottles (and re purpose them into vases, etc.), as well as a couple of lamps. I started with a wine bottle and a Crown Royal bottle, just to test out the paint.


I figured it would look pretty good, but had no idea how real it would look once dry. The paint was super easy to apply (made only one mistake) and once dry, really did look like stainless steel! Needless to say, I am addicted. I am suddenly finding myself wanting to paint everything stainless steel!


Not sure how I am going to finish these. I feel the need to add something else (not sure what yet) to a couple of the bottles (namely, the Crown bottles) to make them less recognizable as adult beverage containers. 

There you have it, folks: MY version of recycling!

Thursday

A Two Hour Investment for a Lifetime of Sweet Memories (Poetic, right?)

I am by nature, a very sentimental person; not with everything though, just in regards to things that really matter.  As a result, I still have every single wedding card Chris and I received (two years ago).  I stashed each one away in a box, along with the leftover programs, save the dates and wedding invitations. I also have a few 'Amy and Chris, November 6, 2010' cocktail napkins and some match books.

So...what can you possibly do with dozens and dozens of wedding cards?

Collage them!

Now, before I go any further let me say this: I did NOT get this idea from Pinterest. This one is all mine!

I started with a large frame from Michael's. You could use any size. We chose an 18"X24" poster frame. The next step was actually the hard part; I pulled out ALL the wedding cards and one by one, decided which ones would fit into the frame. Honestly, I would have included every single one if I could have. Unfortunately, however, this was intended to be a framed collage, not an entire wall mural. The rest of the (unused) cards are still being saved in the original wedding paraphernalia box.

Once the cards were arranged to my liking, I began placing them carefully on the board. I just used the blank side of the poster insert (the paper that comes inside the frame), but you could do it any way you'd like. I also added black and white scrapbook paper into the blank spots of the frame, covering the cardboard of the backing. I secured the pictures with Scotch brand adhesive pads (the little squares with the double backing), and scotch tape. I centered all the cards around a photos, program from our wedding ceremony, an invite and RSVP card, a cocktail napkin, and a newspaper from our wedding day (I used photos and paper to cover some of the front page headlines from that day...economic recession=major wedding collage buzz kill).

I completed the collage by printing out copies of the lyrics to our first dance and cutting the lyrics into random strips. I arranged the strips throughout the collage to give the frame the finishing touch.

Once the collage was framed, I used a metallic silver paint pen to draw small hearts on the glass of the frame, making the collage look more three-dimensional.


< Cards and wedding "stuff" in frame. I have been planning this project for about a year now. Looking through all of these cards evoked so many great memories. Nothing could possibly make you feel more loved than to re-read 100+ cards from those you hold dearest, each offering blessings and words of wisdom.


Funny...only took me about two hours. Procrastination at its finest, people.

And here's a close-up:


Now I just have to figure out where to hang this thing...

Monday

Update on the tragic tale about the Washing Machine(s)

After our long journey through appliance shopping hell, we have finally settled with a brand new, fully functioning washing machine. It is a ge and we did get it from Lowe's. When we returned the "lemon" that Lowe's sold us from the scratch and dent section, they were very apologetic. They happily took the washer back and refunded our money.

They also gave us a great deal on a new washer (see Washer #4 below).


Now Washer #4 has settled in nicely in our laundry room and is washing away as quickly as it can. I do not miss the singing, chiming and beeping of the old fancy washer. This one is very standard, with turn knobs and nothing digital. True, this whole situation could have been avoided if we had just gone to Lowe's and purchased a new washer to begin with but that just isn't our style. We like the adventure and, eventually the humility that comes with owning a house and trying to make it a home.


Moral to this story: Yay, Lowe's!

Now, I have to go. I have LOTS of laundry to catch up on.

-THE END-